What’s this blog about?
 A while back, I created AuxinOS, an x86 Operating System targeted for Intel machines.
Auxin is just an OS that I developed so I can better understand computer systems, and this is a blog I wrote in order to explain how I developed AuxinOS.
You can watch the demo on Youtube.
BTW, since the compressed tarball of the OS is too large, I cannot upload it to a GitHub repo (there is a limit of 2 GB per file).
Introduction
When I was in my third year of college, I remember taking a class called From Sand to Apple: Intro to Integrated Circuits (Apple here is the electronics, not food, btw.). During one of the labs, we were asked to dismantle a smartphone and record its core components.
My team was assigned Xiaomi Mi 6 by the Professor.
What’s interesting was, a lot of its core components are not Xiaomi’s: CPU & power management unit was designed by Qualcomm, RAM by SK Hynix, Flash by Samsung, etc. I’m not sure to what extend Xiaomi’s components were outsourced, but in essence, when building a phone, Xiaomi gathers core components from other vendors, and put them all together into their motherboard. When these components are interconnected, they become a working smartphone.
Actually, this is more of a rule than exception: With the exception of some companies like Apple (at least for their core components like the processor), most companies outsource a lot of their components to others.
When you think about it, engineering is more or less the same.
In software engineering, we can, for example, use Nginx as reverse proxy, Redis as cache, MySQL server as database, NodeJS as server, etc. As a software developer, we gather these tools, assemble them, and write code so that they can work together.
In aerospace engineering, when NASA was developing the Saturn V rocket, the engines (from stage I to III) are all developed by RocketDyne, the first stage by Boeing, second stage by North American Aviation, third stage by Douglas Aircraft Company, instrumentation unit (basically the flight computers) by IBM, CSM (Command Service Module) by North American Aviation, LM (Lunar Module) by Grumman, etc.
And many more.
P.S. I’m not knowledable enough in aerospace engineering to elaborate what I mentioned further, but hopefully you get my point.
How x86 computers boot
To explain how I built AuxinOS, I think it would be best for me to explain it by following the boot process of a computer.
When a user turns on a computer, the CPU will look at the memory location that stores the start address of the BIOS in the BIOS ROM. This memory location is known as the reset vector, and usually, it is located in address 0xFFFFFFF0 (last 16 bytes of memory). However, in modern motherboards, we use something called UEFI, or Unified Extensible Firmware Interface. In a UEFI system, the reset vector is dependent on the vendor.
The BIOS will then start initializing hardware (CPU, RAM, etc.). After that’s done, the BIOS will do some testing to make sure all components are well. This is known as POST (Power On Self Test). Once done, the BIOS will hand over control to the bootloader. While there are many bootloader available, I will use GRUB as specific example in this blog.
Now, there are two different types of BIOS, legacy (uses MBR, or Master Boot Record), and UEFI. For this blog, I’ll focus on UEFI BIOS.
In a UEFI system, the disk uses the GPT (GUID Partition Table) scheme. In its simplest form, a disk can be partitioned as follows:
/
|-- /boot
|    |-- /efi
|           |-- /EFI
|                 |-- /[BOOTLOADER_ID]
|                 |     | -- grubx64.efi
|                 |-- /BOOT
|                       | -- BOOTX64.EFI
| ....
| **THE REST OF THE OS**
| ....
Once the hardware setup & testing is over, UEFI will look for the /boot/efi partition. This is a special partition that uses a special type of filesystem, the EFI System. Initially, it will try to look for grubx64.efi. However, if that cannot be found, then it will fallback to BOOTX64.EFI instead. If both attempts fail, then the system will be halted.
Once the bootloader is located, control is then passed on to the bootloader. The bootloader will then do some setup (although not mandatory), locate the kernel (for this blog, we’ll use Linux as an example), and pass control to it. The bootloader achieves this by following the instructions given in its config file. For example, here’s the config file for Ubuntu 20.04:
#
# DO NOT EDIT THIS FILE
#
# It is automatically generated by grub-mkconfig using templates
# from /etc/grub.d and settings from /etc/default/grub
#

### BEGIN /etc/grub.d/00_header ###
if [ -s $prefix/grubenv ]; then
  set have_grubenv=true
  load_env
fi
if [ "${initrdfail}" = 2 ]; then
   set initrdfail=
elif [ "${initrdfail}" = 1 ]; then
   set next_entry="${prev_entry}"
   set prev_entry=
   save_env prev_entry
   if [ "${next_entry}" ]; then
      set initrdfail=2
   fi
fi
if [ "${next_entry}" ] ; then
   set default="${next_entry}"
   set next_entry=
   save_env next_entry
   set boot_once=true
else
   set default="0"
fi

if [ x"${feature_menuentry_id}" = xy ]; then
  menuentry_id_option="--id"
else
  menuentry_id_option=""
fi

export menuentry_id_option
Once control has been passed to the kernel, the kernel will begin executing. Its starting point is the function start_kernel() under init/main.c. The kernel will do some initializations, such as loading the kernel modules, initializing hardware, and mounting the root filesystem.
You may wonder, but haven’t the hardware been initialized by the BIOS? Well, yes, but they’re not ready to be used yet. At that stage, the hardware is initialized “just enough” for the next stage to proceeed. Anyway, during hardware initialization, there are two types of hardware to be initialized:
Discoverable device
These devices can be detected by the kernel immediately, such as PCI, SATA, or USB devices. Once detected, the kernel will first create an entry in the /sys (virtual) filesystem, before sending a uevent to the user space. Later on, a background process (in this example, udevd is used) will service these uevents by applying relevant rules to the device, load drivers (if not loaded yet), before finally creating a device node for the device under /dev.
Undiscoverable device
This is for the less standardized parts, such as fan, battery, etc. In an x86 system, the kernel needs extra help discovering them, and it uses ACPI (Advanced Configuration Power Interface) table to do that. This table is made by the motherboard’s manufacturer and we don’t really need to worry about it.
As an extra note, for ARM machines, we also use similar strategy, but the difference is we use something called device tree instead of ACPI table.
Once completed, the system will then enter userspace mode, and the kernel will load an init process as the first process with PID = 1. It will look in various locations, such as:
/sbin/init
/bin/init
/etc/init
If the kernel cannot find any init processes, then it will invoke a kernel panic, and the system halts.
There are many types of init processes, and some of examples are systemd, sysVinit, and runit. These processes will do further initialization defined by the users. Once completed, there are two possibilities:
1. Command Line Login
If this is the case, then the system will run a getty terminal which will immediately pass control to login, which will prompt the user for username & password. If the authentication is successful, then a shell will be spun off.
2. Graphical Interface Login
If this is the case, the system will load a display manager, which is essentially a GUI login page. If authentication is successful, it will then start the display server.
And you now can enjoy your computer!
Getting started
With the concepts out of the way, let’s begin development. Back then, the first thing that came to my mind was, “How do I even start??”. Well, here’s what I ended up doing:
- Prepare two disks, and install an already-made OS (let’s call this development/host OS) on one of them (I chose
Ubuntu 20.04) - On the other disk, partition the empty disk and create filesystems in each partitions.
- Mount the other disk to the development/host OS. Not sure how you do it on
Windows. InUbuntu 20.04, you can define it in the mount table/etc/fstaband then runmount -a.
As an example, here’s my mount table for the host OS:
# /etc/fstab: static file system information.
#
# Use 'blkid' to print the universally unique identifier for a
# device; this may be used with UUID= as a more robust way to name devices
# that works even if disks are added and removed. See fstab(5).
#
# <file system> <mount point>   <type>  <options>       <dump>  <pass>
# / was on /dev/sdb2 during installation
UUID=6e291b81-009e-40e1-9dbc-609d49f1313a /               ext4    errors=remount-ro 0       1
# /boot/efi was on /dev/sdb1 during installation
UUID=CF84-0CDD  /boot/efi       vfat    umask=0077      0       1
/swapfile                                 none            swap    sw              0       0
# AXOS /
/dev/sda2 /mnt ext4 defaults 1 1
Oh and by the way, I’m doing all this on a VM (I used VirtualBox, but this is purely out of habit - in my school, we often use VirtualBox and never VMWare).
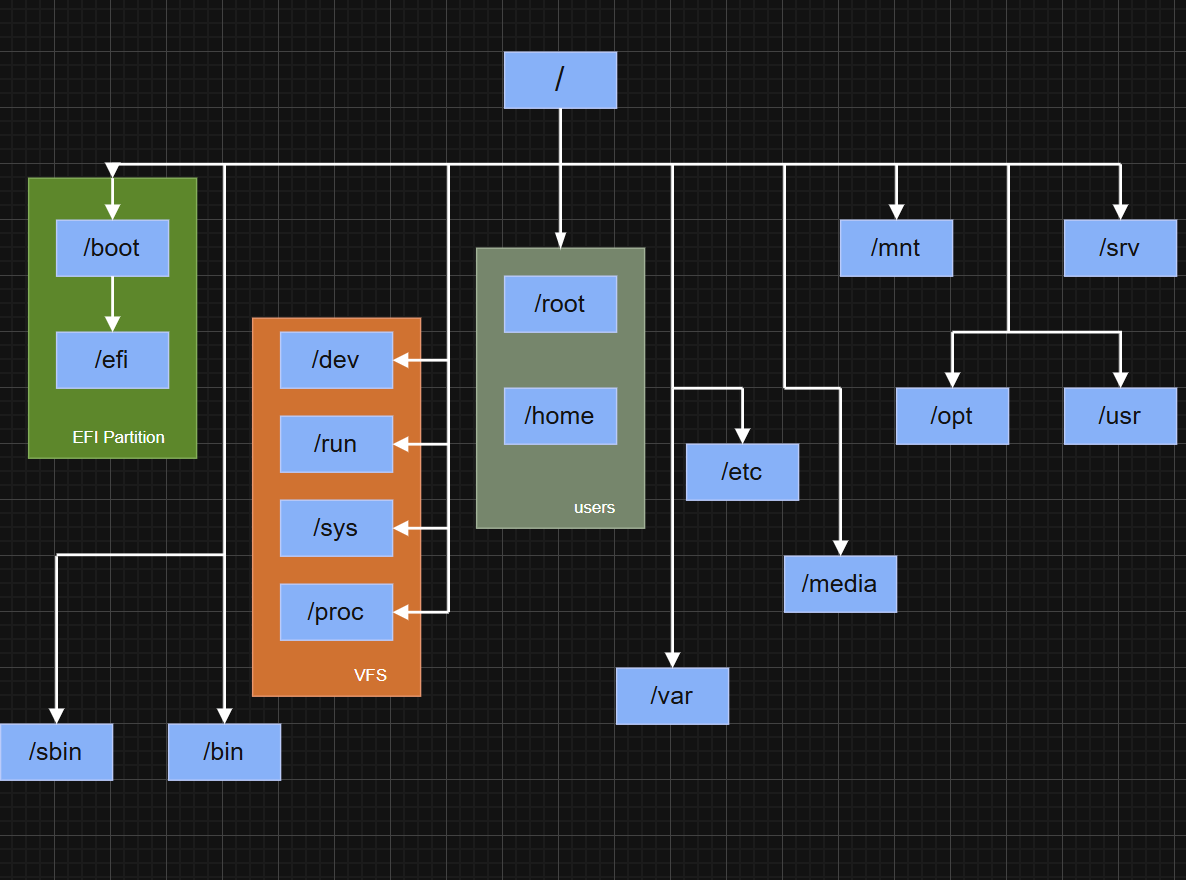
Next up, I need to define the filesystem hierarchy of the OS. Here’s what I came up with:
Components of an Operating Systems
Remember earlier when I mentioned that in engineering, often times we build things by gathering what others have made and assemble them into one working system? Well, thanks to the Open Source community, we can do the same with Operating System!
Here are some of the major components of an OS, what I considered using, and what I ultimately used:
| component | | some open source projects I considered | | what I ended up choosing |
|---|---|---|
| kernel | | freeBSD’s kernel, Linux, Hurd | | Linux |
| utilities | | coreutils, busybox, uutils | | coreutils |
| Library | | Glibc | | Glibc |
| init | | sysVinit, systemd | | sysVinit |
| Compiler | | GCC, Clang | | GCC |
| Shell | | Bash | | Bash |
| display server | | X11 | | X11 |
| bootloader | | GRUB, Lilo | | GRUB |
Of course, there’s more than this, but these are the ones that I want to highlight.
let’s walk through them one by one.
1. kernel
This is the heart of the Operating System - kernel is to OS as CPU is to a PC; kernel is to OS as an engine is to a car.
The kernel is the heart of the system because it acts as the intermediary between user space programs (including the applications you use daily: web browser, social media, etc.) and the computer’s hardware.
By convention, while the user space is allocated the low memory (0x0000000000000000 to 0x00007fffffffffff in 64b systems), the kernel space is allocated the high memory (0xffff800000000000 to 0xffffffffffffffff in 64b systems).
By accessing the /proc/kallsyms directory, we can see where the kernel is allocated in AuxinOS:
root [ / ]# sysctl -w kernel.kptr_restrict=0                                # disable kptr_restrict (a security feature)
kernel.kptr_restrict = 0
root [ / ]# cat /proc/kallsyms | grep -E " _stext| _etext| _sdata| _end"    # get the addresses
ffffffffa8000000 T _stext                                                   # start of text region
ffffffffa9002402 T _etext                                                   # end of text region
ffffffffa9e00000 D _sdata                                                   # start of data region
ffffffffab830000 B _end
ffffffffc062fe80 t _end [sha1_ssse3]                                        # end of data region
But you may wonder, if the kernel is loaded before userspace programs during boot, then why is it located higher up in the memory than the user space? Well, /proc/kallsyms just shows you the virtual address. If you want to know where it is physically located on RAM, then you check it by accessing /proc/iomem:
root [ / ]# cat /proc/iomem | grep -i kernel
  1cd400000-1ce402401 : Kernel code
  1ce600000-1cf0a1fff : Kernel rodata
  1cf200000-1cf64b07f : Kernel data
  1cf9bd000-1d0bfffff : Kernel bss
And sure enough, it is located at the low memory region.
2. Utilities
As a developer, we often use commands like ls, cp, mv, etc. For these command line utilities, I chose GNU’s coreutils since the GNU suite is compatible with Linux and all binaries offered by this package are installed in /usr/bin directory of the final OS. It is worth noting that coreutils is not the only package from the GNU suite that I used. There are others that I used as well, such as grep, diffutils, findutils, gawk, etc. I don’t include them here because otherwise it would’ve been too long. However, they are all command line utilities, and you can choose to install the ones you need/want.
If you want a minimal system, then busybox might be great, as it is already used in embedded applications anyway.
3. Library
user space programs have restrictions - it cannot access the memory location outside of the user space. Despite this, a program will eventually beed to access those restricted memories regions. For example, if a program would like to read or write data from a disk, it would need to cross the kernel space.
So how is this achieved? Well, via system calls. And there is a library that abstracts these system calls: Glibc, yet another package from the GNU suite. For Auxin, glibc resides inside the /usr directory, scattered in many subdirectories such as /usr/lib, among others.
4. Init
Init is the first user space process created, with PID=1. SysVinit is responsible for doing initialization in the user space, before finally launching either a getty terminal or display manager, depending on the *runlevel*.
What is a runlevel?
Well, in a SysVinit-based systems, there are six runlevels, which are essentially operation mode. A summary is as follows:
| Runlevel | Name | Description |
|---|---|---|
| 0 | Halt | Shuts down the system safely; all processes stopped. |
| 1 | Single-user mode | For maintenance; root login only; no networking or multi-user access. |
| 2 | Multi-user (no NFS) | Multi-user mode without network file sharing (NFS); Debian uses this as default. |
| 3 | Full multi-user | Standard multi-user mode with networking (but no GUI). |
| 4 | Undefined | Custom/user-defined; unused by default on many systems. |
| 5 | Multi-user + GUI | Same as runlevel 3, but also starts a graphical login (X). |
| 6 | Reboot | Reboots the system. |
These are just conventions defined by the LSB (Linux Standard Base) Standard - in actuality, it is up to us to implement it. As for me, I only implemented runlevel 1, 3, 5, and 6.
So, when init gets spun off, it first looks at the commands in /etc/inittab. As for me, here’s how it looks like:
# default runlevel
id:3:initdefault:

# runlevel S. Apply this to all runlevels.
si::sysinit:/etc/init.d/rc S

# runlevel-specific initializations / cleanups
l0:0:wait:/etc/init.d/rc 0
l1:S1:wait:/etc/init.d/rc 1
l2:2:wait:/etc/init.d/rc 2
l3:3:wait:/etc/init.d/rc 3
l4:4:wait:/etc/init.d/rc 4
l5:5:wait:/etc/init.d/rc 5
l6:6:wait:/etc/init.d/rc 6

# shuts down when ctrl+alt+del (cant choose another keys)
ca:12345:ctrlaltdel:/sbin/shutdown -t1 -a -r now

# emergency boot
su:S06:once:/sbin/sulogin
s1:1:respawn:/sbin/sulogin

# spawns ttys: tty1 as main; tty2 as backup; tty7 for GUI
1:2345:respawn:/sbin/agetty --noclear tty1 9600
2:2345:respawn:/sbin/agetty tty2 9600
3:2345:respawn:/sbin/agetty tty7 9600

# spawn display manager if runlevel 5
dm:5:respawn:/etc/init.d/sddm
As can be seen above, the script rc will be invoked to do some initializations and the desired runlevel will be passed as a parameter. Here’s my implementation of the rc script:
#!/bin/bash
# used to handle runlevel transitions
. /lib/lsb/init-functions


# 0) helper functions
# ==============================================================================================
print_error_msg()
{
   log_failure_msg "FATAL: an error occured that prevents the system from booting."
   log_info_msg "Press Enter to continue..."

   # wait for user....
   read ENTER
   return 0
}

run()
{
   ${1} ${2}
   return $?
}


# 1) script starts here
# ==============================================================================================

# These 3 signals will not cause our script to exit
trap "" INT QUIT TSTP

# 1.1) get the runlevel argument (/etc/init.d/rc RUNLEVEL_ARG)
# ==============================================================================================
if [ "${1}" != "" ]; then
   runlevel=${1}
else
   echo "Usage: ${0} <runlevel>" >&2
   exit 1
fi


# 1.2) set previous runlevel var & check if argument passed is valid
# ==============================================================================================
previous=${PREVLEVEL} # PREVLEVEL is set by sysVinit (/sbin/init)
[ "${previous}" == "" ] && previous=N

if [ ! -d /etc/rc${runlevel}.d ]; then
   log_failure_msg "/etc/rc${runlevel}.d does not exist.\n"
   exit 1
fi


# 1.3) turn on the font & keyboard config from /etc/sysconfig/console (red-hat style)
# ==============================================================================================
if [ "$runlevel" == "S" ]; then
   [ -r /etc/sysconfig/console ] && source /etc/sysconfig/console
   dmesg -n "${LOGLEVEL:-7}"
fi


# 1.4) stop all scripts of the previous runlevel
# ==============================================================================================
if [ "${previous}" != "N" ]; then
   for i in $(ls -v /etc/rc${runlevel}.d/K* 2> /dev/null)
   do
      # if symlink not valid or executable, skip.
      if [ ! -f ${i} ] || [ ! -x ${i} ]; then
         log_warning_msg "${i} is either not a valid symlink or not executable"
         continue
      fi

      # if the script has been previously stopped, continue.
      suffix=${i#/etc/rc${runlevel}.d/K[0-9][0-9]}
      [ -e /etc/rc${previous}.d/K[0-9][0-9]$suffix ] && continue

      # else, we stop.
      run ${i} stop
      error_value=${?}

      # any errors?
      if [ "${error_value}" != "0" ]; then
         print_error_msg
      fi
   done
fi


# 1.5) is this boot? (i.e. not a transition)
# ==============================================================================================
if [ "${previous}" == "N" ]; then export IN_BOOT=1; fi

if [ "$runlevel" == "6" -a -n "${FASTBOOT}" ]; then
   touch /fastboot
fi


# 1.6) now start the current runlevel
# ==============================================================================================
for i in $( ls -v /etc/rc${runlevel}.d/S* 2> /dev/null)
do

   # has the script been started in the previous runlevel? if yes, skip.
   if [ "${previous}" != "N" ]; then
      suffix=${i#/etc/rc${runlevel}.d/S[0-9][0-9]}
      [ -e /etc/rc${previous}.d/S[0-9][0-9]$suffix ] && continue
   fi

   # if symlink not valid or executable, skip.
   if [ ! -f ${i} ] || [ ! -x ${i} ]; then
      log_warning_msg "${i} is either not a valid symlink or not executable"
      continue
   fi

   # start the script!
   run ${i} start
   error_value=${?}

   # any errors?
   if [ "${error_value}" != "0" ]; then
      print_error_msg
   fi
done

# End rc
What the script above does is once executed, the script will execute all scripts inside the directory /etc/rc*.d, where * is the runlevel. For example, when runlevel 3 is invoked:
rc 3
Then all the scripts inside the /etc/rc3.d will be executed. Of course, in each runlevel directories, you have to make your own scripts to initialize the system as well.
5. Compiler
I think this one is self explanatory. You need a compiler to, well, compile the programs. Also, when building Auxin, I installed a dummy compiler inside /mnt/usr/bin (later on, /mnt/usr/bin becomes /usr/bin) to compile other components. I initially wanted to use Clang since it has better optimizer (as seen by the performance of the binaries generated), but Clang has LLVM (Low Level Virtual Machine) as its dependency (what do you expect? Clang is LLVM-based compiler) and it is a lot of hassle to install LLVM, so I go with the classic GCC.
Anyway, I’m not too familiar with the world of compilers & programming languages.
At least that was my initial thought. When I tried to add GUI capabilities on Auxin, one of the packages that I have to install is Mesa, a graphics library.
And guess what package Mesa depends on? LLVM. Yes.
6. Shell
When a system uses CLI (say, runlevel 3), sysVinit will spawn getty after it finishes running all bootscripts (in accordance to /etc/inittab). getty will execute the login binary (normally under /bin/login), which will then ask the user to enter their the credentials. If the credentials are valid, login will then set the UID, run some initializations (for my case, mostly setting up environment variables) from various directories such as /etc/profile.d, /etc/bash_profile, ~/.bashrc, etc. and spawn a shell for that user. For the shell, I chose bash.
Why? No particular reason. I just like it.
Now, we can just use login alone and hardcode all the authentication logic ourself. However, a better way would be to outsource the authentication duties to another package: Linux-PAM. With PAM, the process is as follows:
gettylauncheslogin.- user enters credentials.
loginrunsPAM, which will handle authentication logic.- if authentication is successful,
loginwill take over. loginwill set UID & do some initialization.- Shell is launched!
7. Display Server
Ah yes, the display server. This is the most complex part of the build (externally, of course. Internally, the kernel is more complex).
So I guess it’s best to start with the theory. As mentionned before, in a system with CLI-based UI, when the system has finished booting and user authentication is successful, a shell will be initialized. Actually, a more nuanced description is as follows: when a system is ready to be used, a terminal, which is just an interface that lets the user to interact with the computer, is spun off.
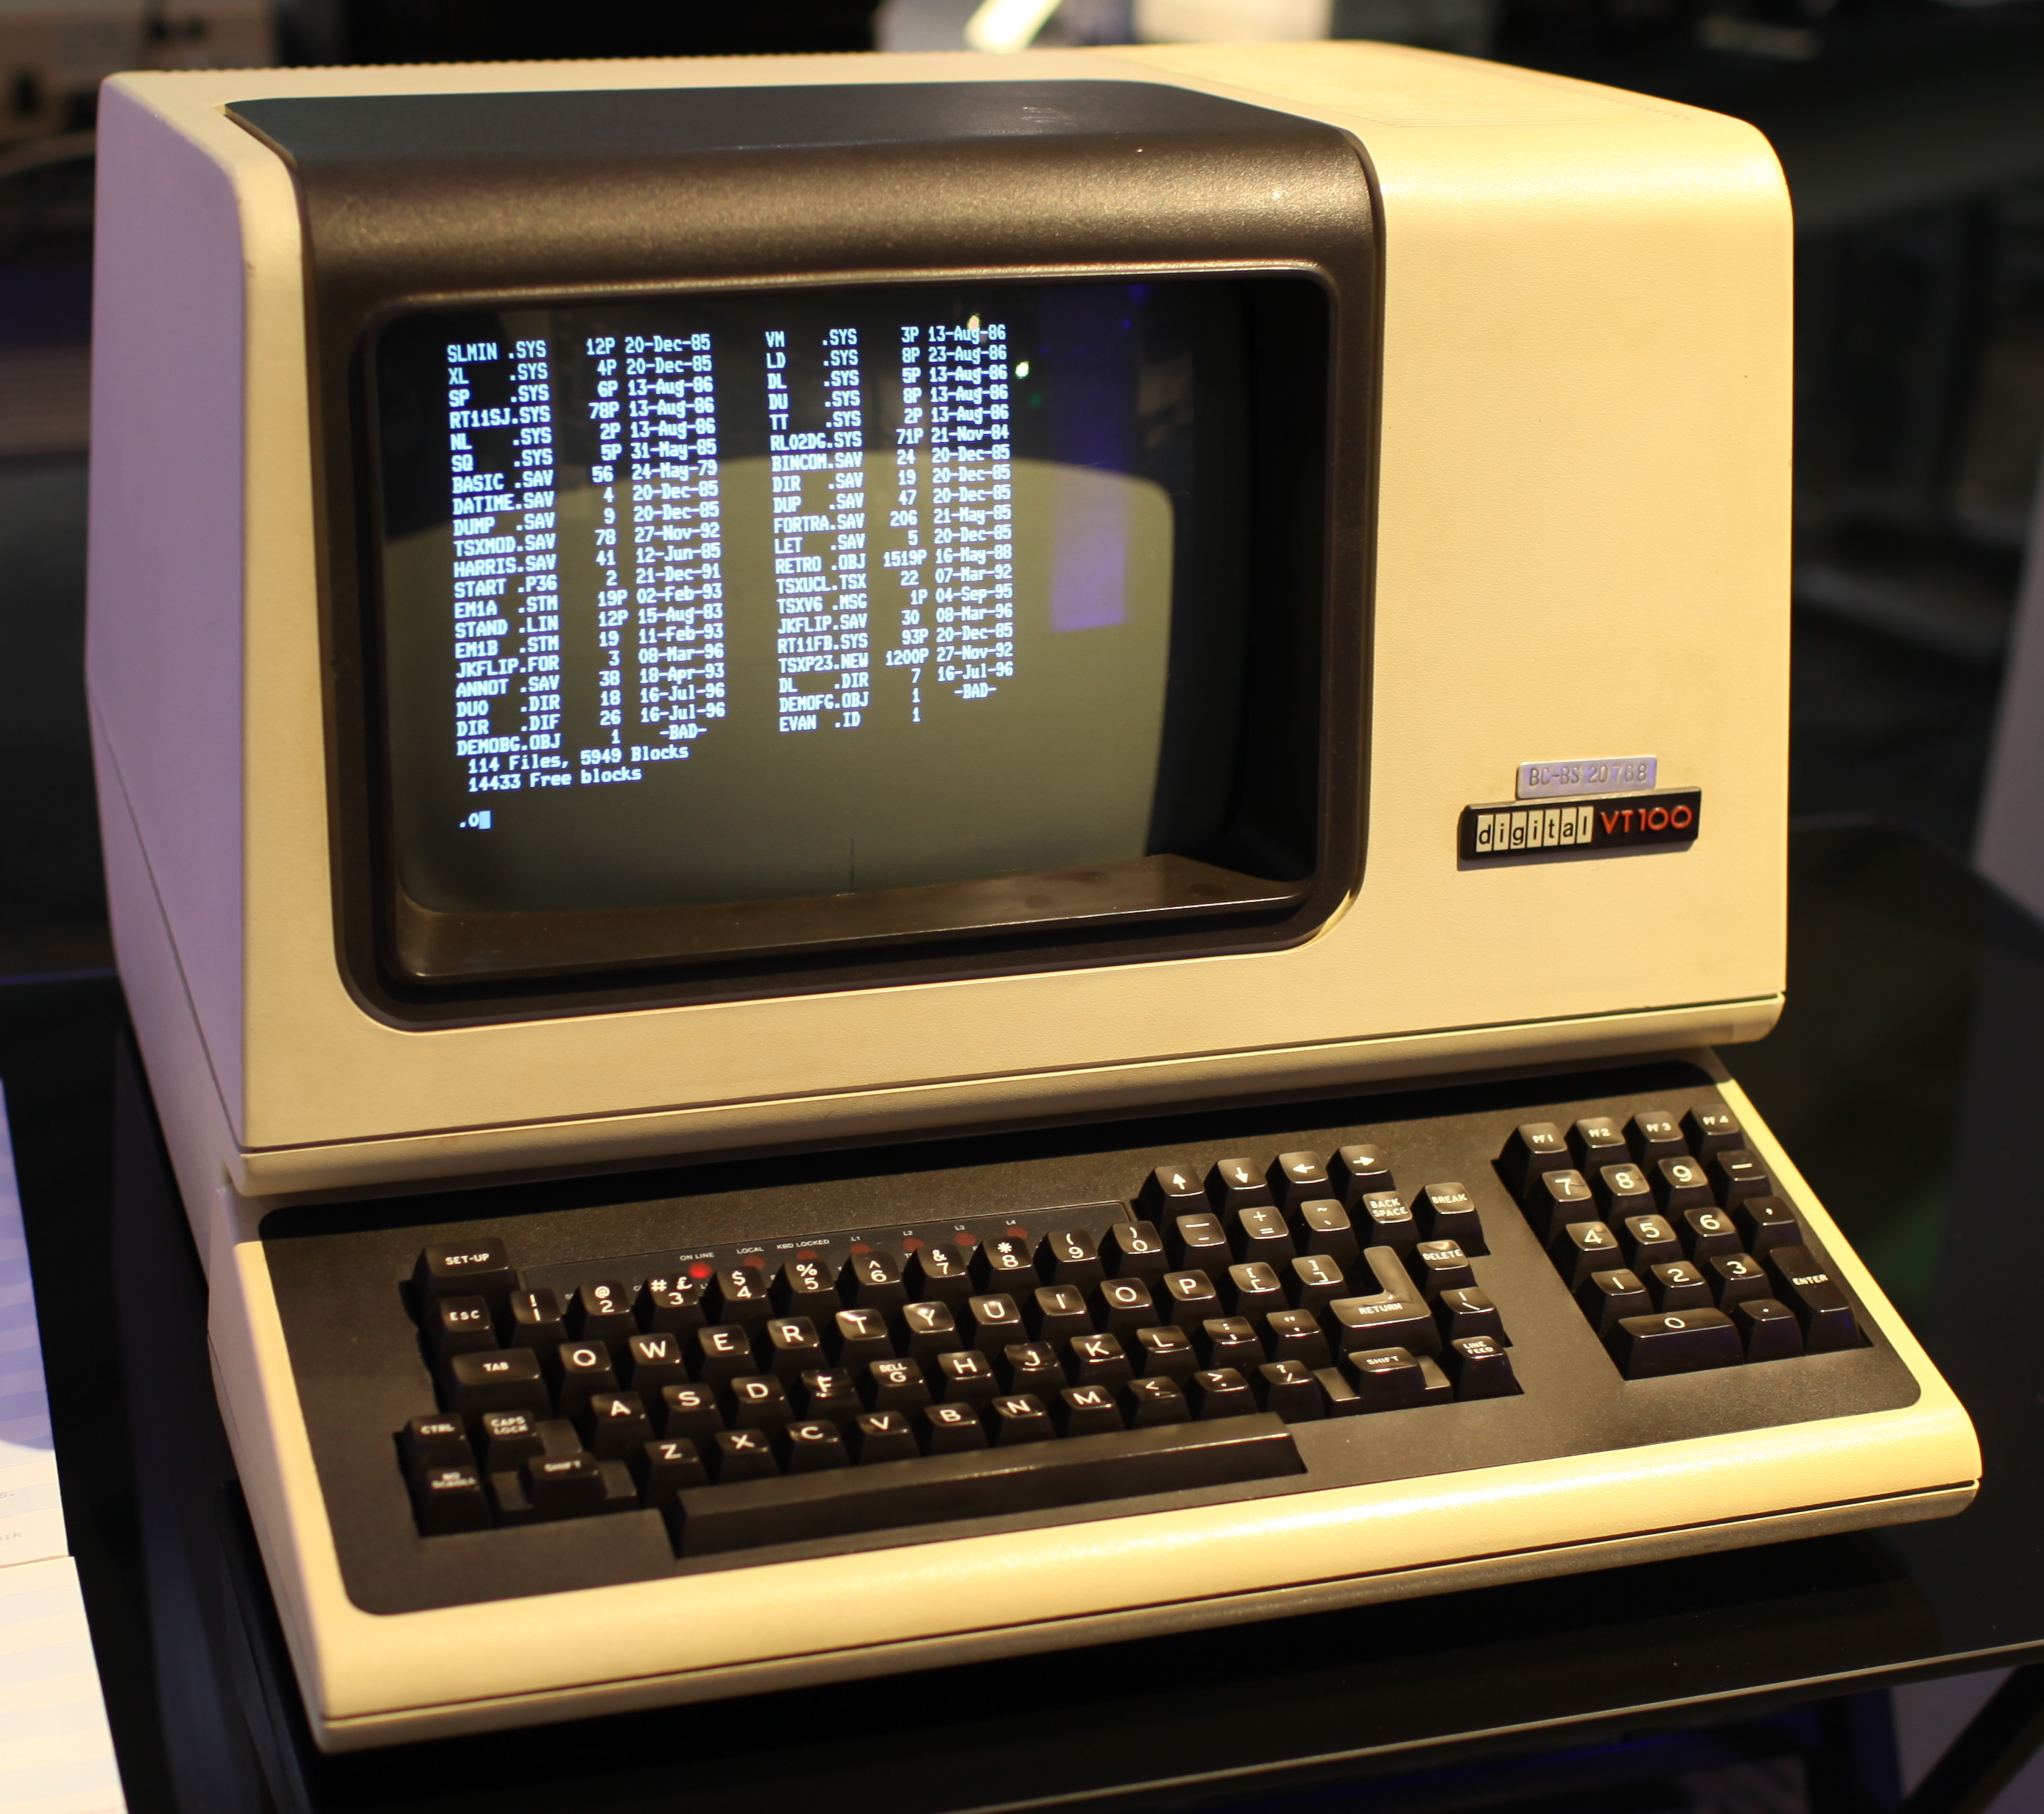
In the early days of computing, terminal is an actual physical object, like the VT100 terminal:
However, nowadays, we use virtual terminals, and it is represented with /dev/tty*, where * is just a number. Actually, you may remember that earlier, we asked init to spawn three ttys: tty1, tty2, & tty7:
# ** .... /etc/inittab .... **

# spawns ttys: tty1 as main; tty2 as backup; tty7 for GUI
1:2345:respawn:/sbin/agetty --noclear tty1 9600
2:2345:respawn:/sbin/agetty tty2 9600
3:2345:respawn:/sbin/agetty tty7 9600

# ** .... /etc/inittab .... **
And the shell is just a program that runs inside one of the terminals. To be more specific, when a system boots at runlevel 3:
- The kernel do some initialization.
initexecutes bootscripts inside both/etc/rcS.dand/etc/rc3.d.initwill launch three terminals,tty1,tty2, andtty7.gettywill be launched, which will immediately pass control tologinand proceeds with user authentication usingPAM.- If authentication is successful,
loginsets the UID and do further initializations (mostly environment variables). - Finally, the
shell, in this casebash, is launched.
When GUI is involved, after a successful login, instead of creating a shell, the OS will launch a display server. Here, we’ll use X11. To explain how X11 works, let’s look at the following diagram:
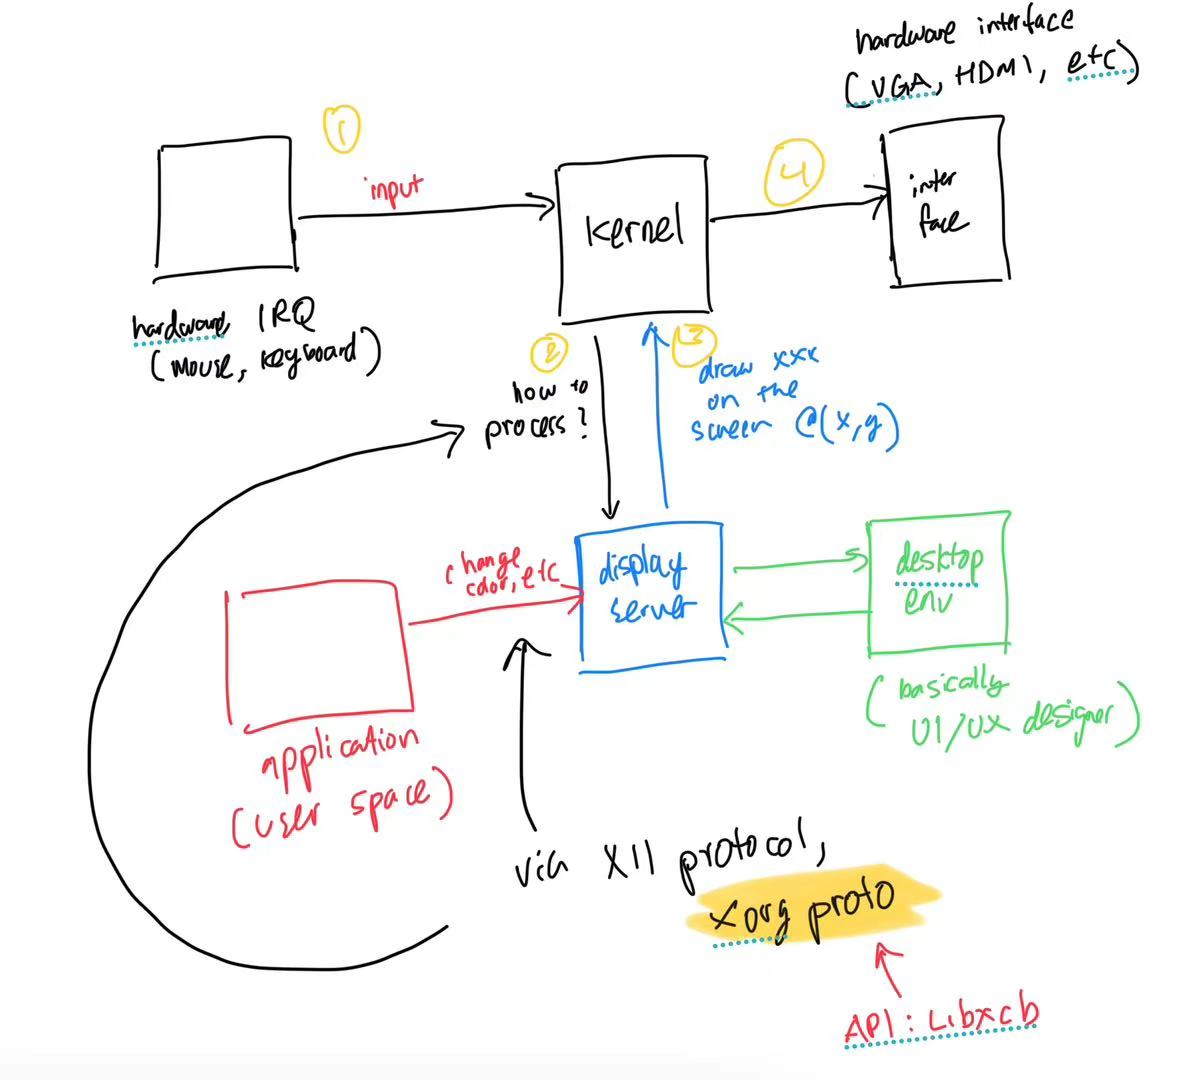
1. Input
There are two types of inputs: application-initiated and interrupt-initiated.
For application-initiated inputs, the process is quite simple: whenever a user space application wants to draw something on the screen, it will make a request to the display server using an X11 protocol known as X11 Proto, whose APIs are provided by the libxcl package via a UNIX Socket, for example via DISPLAY=:0.
What’s a socket? Well, it is just an endpoint provided by a process so another process can communicate with it. Similar idea to API endpoints.
For interrupt-initiated inputs, it is a bit more complex: whenever a peripheral device such as mouse or keyboard detects a user input, an interrupt signal will be generated, and the kernel will service it. Once the kernel receives an interrupt signal, it will then be the one to send the request to the display server using the same protocol as the one used by application-initiated inputs.
The display server follows the client-server architecture, and each unique requester is also known as an X11 client.
2. Processing
Once the display server receives a request from a client, it will parse the request and starts creating or editing the client’s window pixel-by-pixel.
What’s a window, you ask? Well, when you open an application, your OS creates a window for you. For example, here’s an example of two windows opened: Chrome and Zoom:
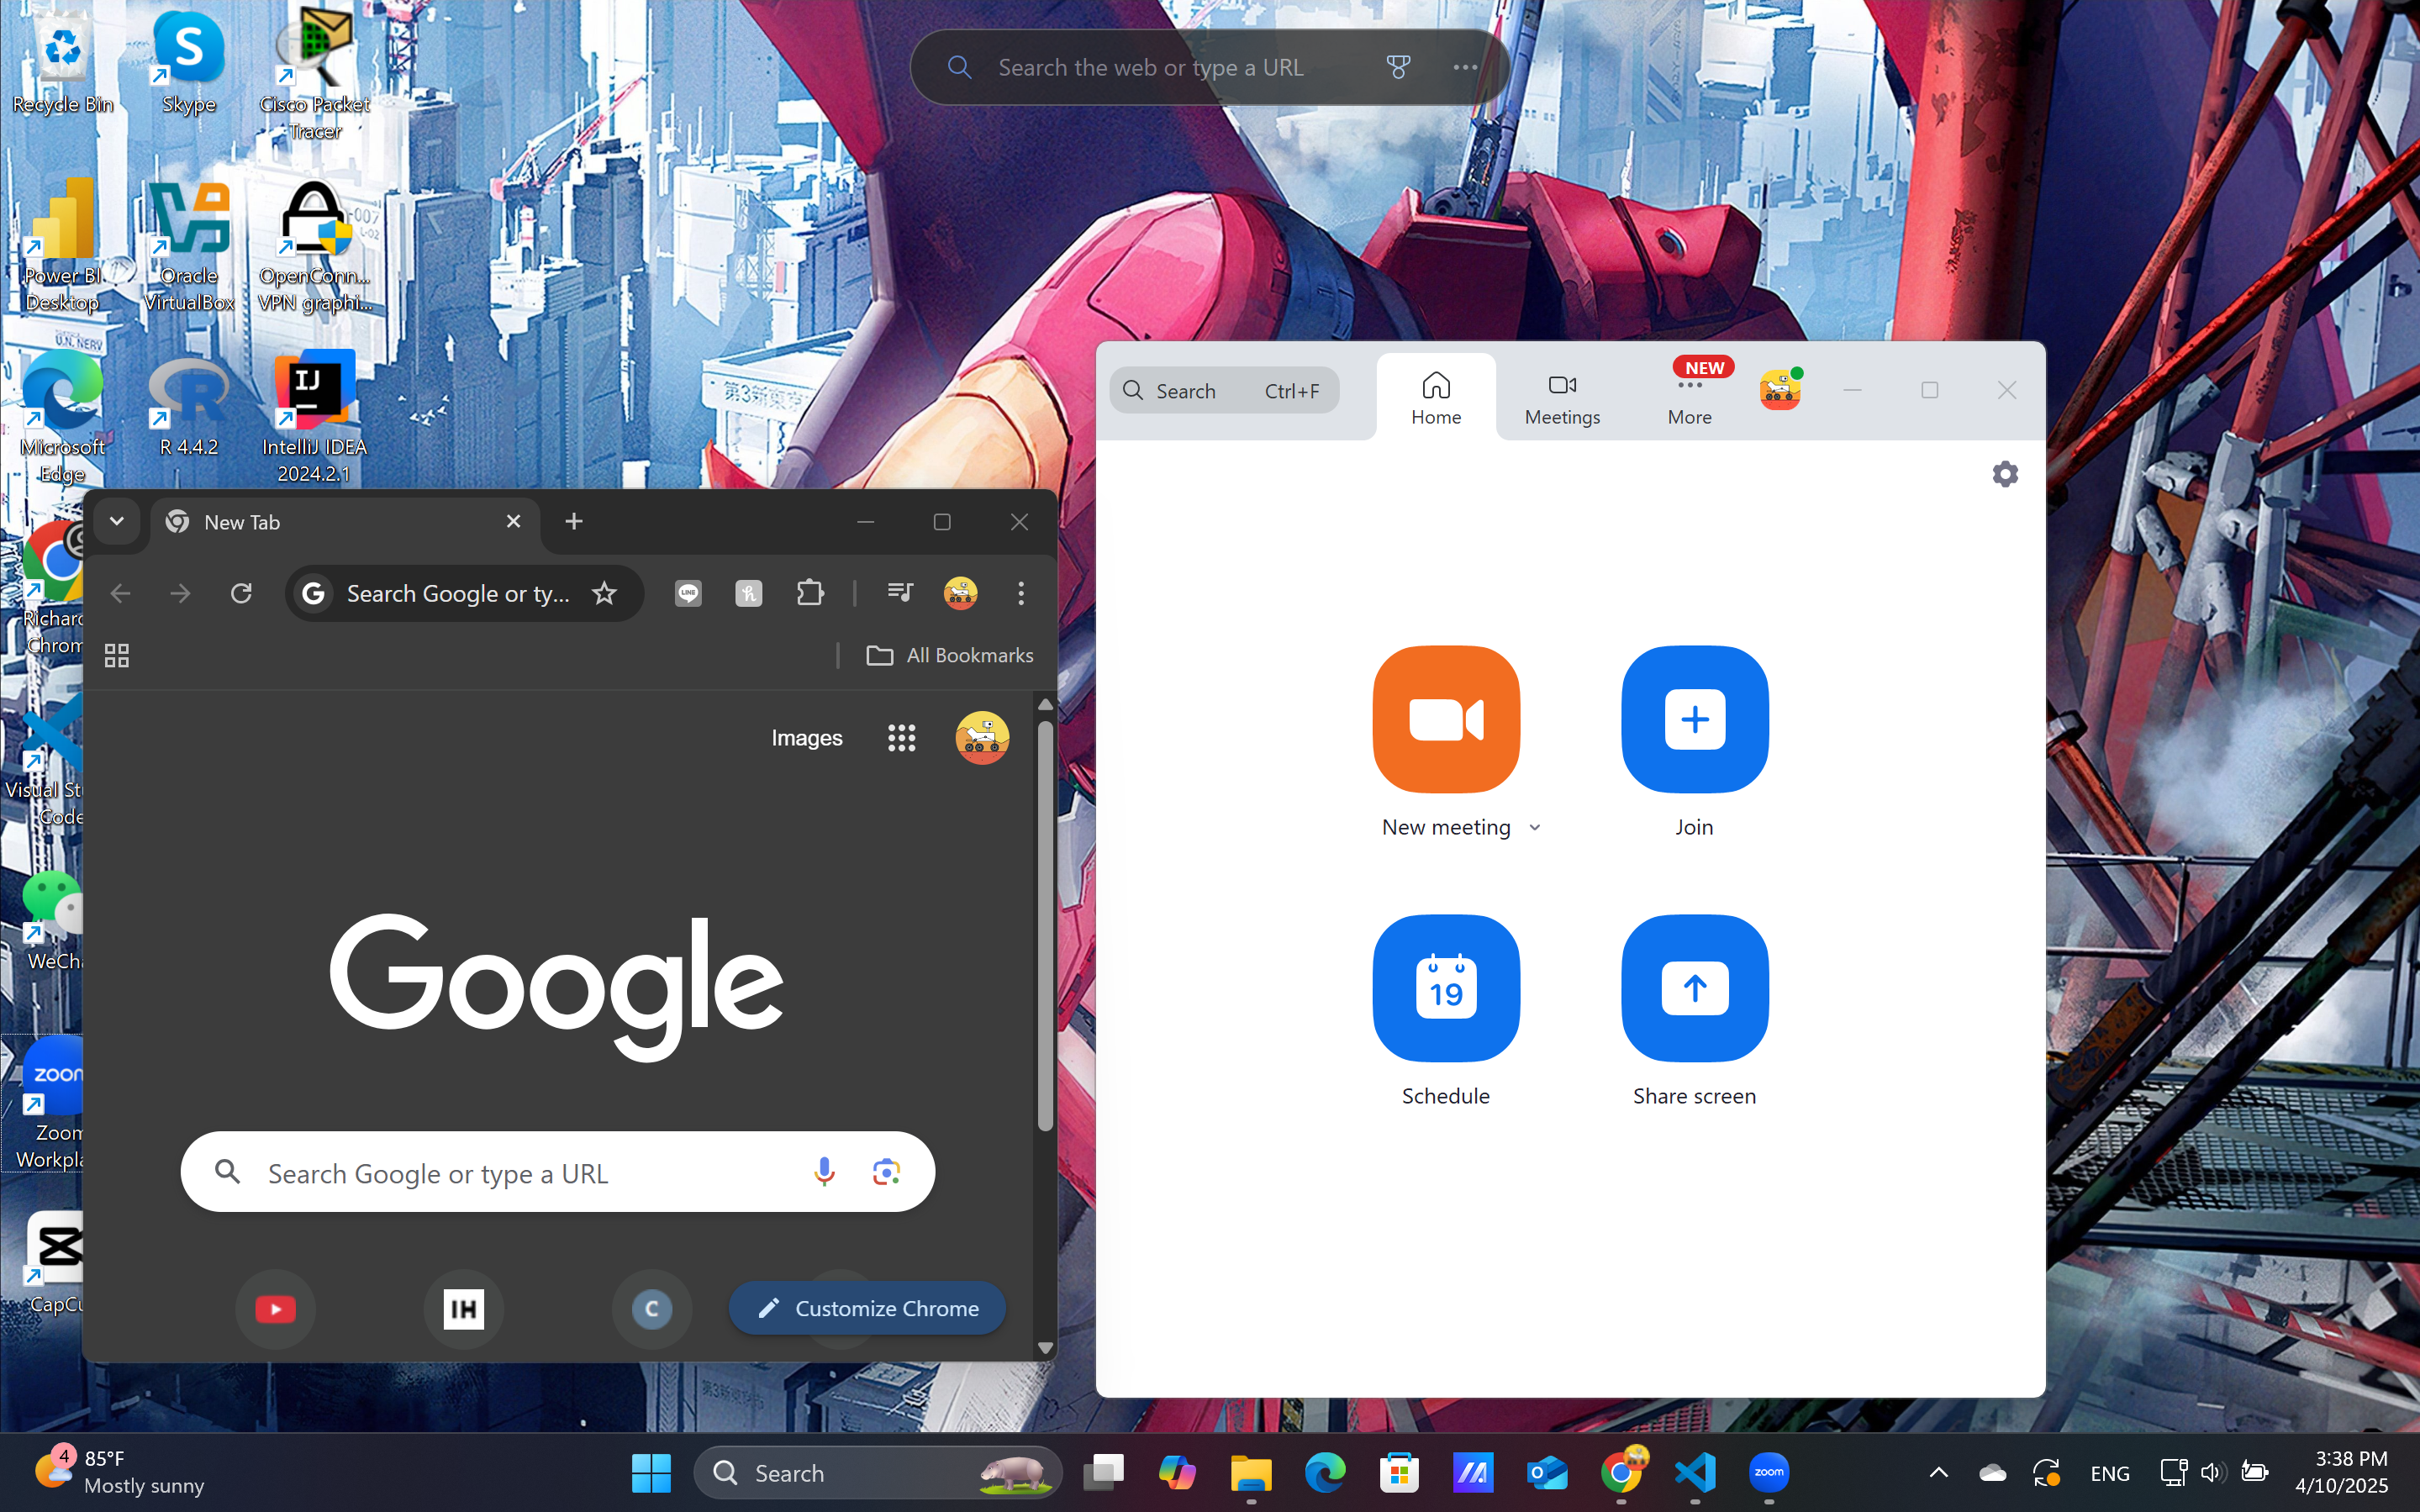
Anyway, when X11 made modifications to a client’s window, a notification will then be sent to the compositor, which takes information about the changes, and modifies the final display accordingly.
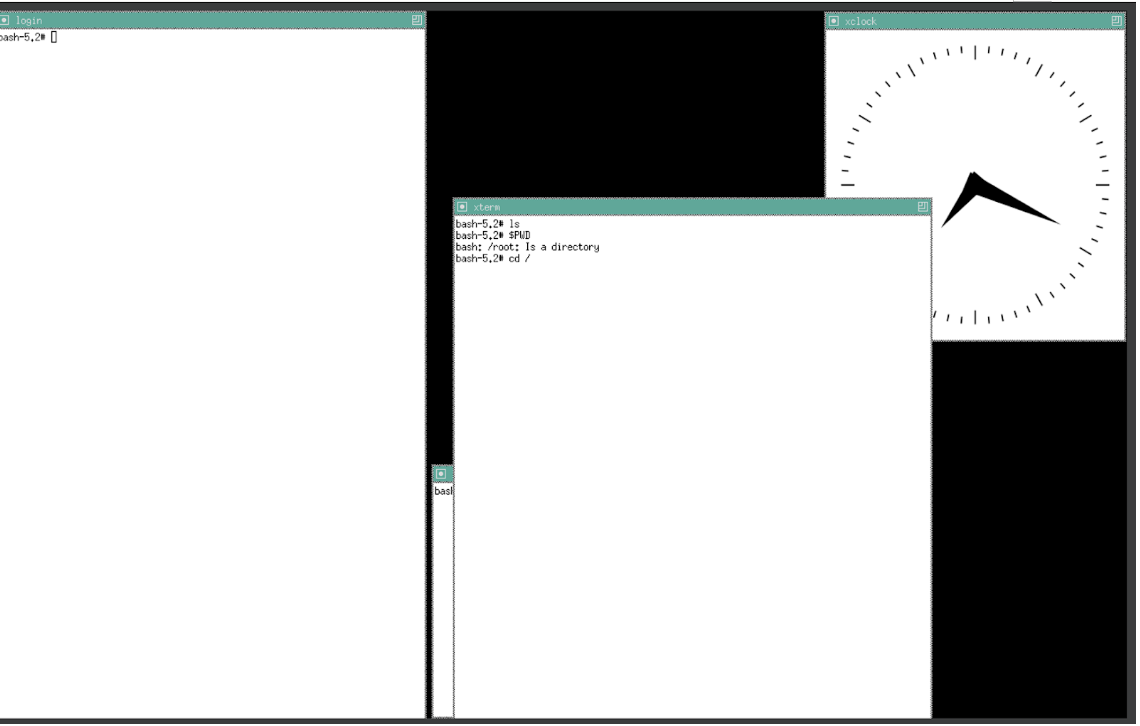
Where is compositor in the diagram? Well, it is part of the Desktop Env. In the final version of Auxin, I used kwin; but for testing (when I didn’t have a Desktop Env yet), I used twm.
You may ask, “What is a Desktop Env?”
Well, it is just a set of packages, along with the compositor that helps generate the final display on the screen. With Desktop Env, you can see start menu, app icons, etc. on the screen.
3. Output
Once the compositor generates the final display, it will then be sent to the DRM (Direct Rendering Manager), which is a kernel subsystem responsible for managing communication with the GPU. If you don’t have a GPU (both integrated and dedicated), then framebufferswill be used instead, which is essentially a dedicated memory that is filled with pixel values of the screen, AKA graphics card (obviously this is very slow, that’s why GPU was invented).
Here’s the result with twm during testing:
And here’s the final result when everything is all and set (sorry I forgot to screenshot the one in the VM):
Pretty cool, eh?
8. Bootloader
As mentioned before, when a computer boots, BIOS is the first to execute. Once it’s done, it will hand over control to the OS, and it does this by locating the bootloader, which will then be responsible for loading the OS.
GRUB, being (arguably) the most well known open-source bootloader, was chosen for Auxin for one reason: because it is the most well known bootloader, community support for it must be larger than other bootloaders, and I need such support in case I encounter any problems.
As mentioned before, GRUB resides in the /boot/efi directory, which itself is under a special partition using a special filesystem known as EFI filesystem. When GRUB is executed, it will look for its config file inside the /boot/grub for its config file, grub.cfg.
My config looks as follows:
# Begin /boot/grub/grub.cfg
set default=0
set timeout=5

insmod part_gpt
insmod ext2
set root=(hd0,gpt2)

insmod efi_gop
insmod efi_uga
if loadfont /boot/grub/fonts/unicode.pf2; then
  terminal_output gfxterm
fi

menuentry "AuxinOS" {
  linux /boot/vmlinuz-6.10.5 root=/dev/nvme0n1p2 ro 5
}

menuentry "AuxinOS (CLI)" {
  linux /boot/vmlinuz-6.10.5 root=/dev/nvme0n1p2 ro
}

menuentry "Firmware Setup" {
  fwsetup
}
Take the topmost menuentry as an example:
menuentry "AuxinOS" {
  linux /boot/vmlinuz-6.10.5 root=/dev/nvme0n1p2 ro 5
}
Here, the command linux tells the bootloader where to find the kernel. root specifies the root path of the system, ro means read-only, and 5 here means to execute init on runlevel 5.
If you want to be more explicit, you can specify the location of the init process to GRUB:
menuentry "AuxinOS" {
  linux /boot/vmlinuz-6.10.5 root=/dev/nvme0n1p2 ro init=/sbin/init 5
}
Deployment: mimicking OEM-like installation to deploy Auxin on an actual hardware
Now that everything is done, there’s one more problem to be solved: How the heck do we install it on a physical hardware?
Originally, I considered using the ISO installation method as doing so would mean that I can share Auxin with others on the internet. However, using ISO installation means that I have to create an installer as well, and I feel like it creates a lot of unnecessary hassle for me.
In the end, I decided to ditch the idea.
With ISO installation out of the way, the remaining method I am aware of is OEM installation (Original Equipment Manufacturer) installation.
However, even OEM installation is still a hassle to implement due to its OOBE (Out-of-the-Box Experience), which is the “setup your computer” feature you often see when booting your computer (either Windows or MacOS systems) for the first time.
In the end, I’m going for what I call “OEM-like installation, where I’m trying to implement an OEM installation without OOBE.
With that out of the way, let’s get started.
Since installing on a physical hardware is risky (if you screw up, then you may not be able to boot from your computer anymore), I tested my procedure a few times on two VMs and even cross-check with other sources.
Interestingly, the method I came up with is quite similar to the ones recommended by Microsoft to hardware developers:
- Prepare two devices,
A&B.Awill haveWindowsinstalled, andBis the target hardware. - In
A, generalize the system usingSysprep(remove hardware-specific info such as NIC MAC address). - Run
Windows PE(a type ofWindowsspecifically used forOEM installation) in deviceA. - Capture the
Windowssystem inAas an image in.WIMformat and put it in an external storage. - In
B, runWindows PEand partition the disk. This is the target disk. - Once partitioned, move the image generated in
step 4to the target disk.
I don’t have “Auxin PE” to replace Windows PE. Instead, I used Ubuntu 20.04 and added some scripts to it. The reason why I didn’t develop “Auxin PE” is because hardware deployment is a risky process and I want as little risk as possible.
Anyway, the process I implemented is as follows:
- Prepare the computer with two disks installed,
disk_A&disk_B.disk_Ais where the modifiedUbunturesides. - From the VM, compress the entirety of
AuxinOSand move it to an external disk. For this purpose, I used the.gzcompression and ended up withroot.tar.gz. - Via the external disk, move
root.tar.gztodisk_A. - Once in
disk_A, run a script that mountsdisk_Btodisk_A, partitionsdisk_B, uncompressroot.tar.gz, and finally installAuxintodisk_B. chrootintodisk_Band re-installGRUB. This way,Auxin’s bootloader will be registered in the BIOS’ boot entry.- Shutdown the computer, and remove
disk_A.
The script that I wrote for step 4 is as follows:
!/bin/bash
# up until binutils

# Enable strict error handling
set -e
error_handler() { # Function to handle errors
  echo "Error Happened somewhere, go back & check!"
  exit 1
}
trap error_handler ERR # Trap errors and call the error_handler function


# 0) compress OS
# =================================================================
mkdir -pv /auxin-os
tar -czvf /auxin-os/root.tar.gz /mnt


# 1) partitioning target disk
# =================================================================
DISK="/dev/nvme0n1"

echo "Creating partitions on $DISK..."

# Create a new GPT partition table
parted -s $DISK mklabel gpt

# Create EFI boot partition (500MB)
parted -s $DISK mkpart ESP fat32 1MiB 501MiB
parted -s $DISK set 1 boot on

# Create ext4 partition (95GB)
parted -s $DISK mkpart primary ext4 501MiB 95501MiB
#parted -s $DISK mkpart primary ext4 501MiB 80001MiB # 80 GB

# sleep for a while to prevent race conditions..
sleep 2

# Format partitions
echo "Formatting partitions..."
mkfs.fat -v -F 32 ${DISK}p1   # Format EFI partition as FAT32
mkfs.ext4 -v ${DISK}p2       # Format ext4 partition

echo "Partitioning and formatting complete!"
lsblk $DISK   # Show the partition layout


# 2) create target directory, mount, then untar the OS to said mountpoint
# =================================================================
mkdir -pv /mnt/auxin-cpy

cat >> /etc/fstab << "EOF"
# AUXIN-CPY ROOT
/dev/nvme0n1p2 /mnt/auxin-cpy ext4 defaults 1 1
EOF

mount -av

tar -xzvf /auxin-os/root.tar.gz --strip-components=1 -C /mnt/auxin-cpy


echo "[SHELL SCRIPT]: ALL DONE! now chroot to the system, mount the ESP within the OS, and finally install grub"
As can be seen, I didn’t write a script that emulates Sysprep, so I cannot do hardware generalization ( for example, /dev/nvme0n1 is manually entered by me after checking the device name of disk_B). But anyway, it works. :)
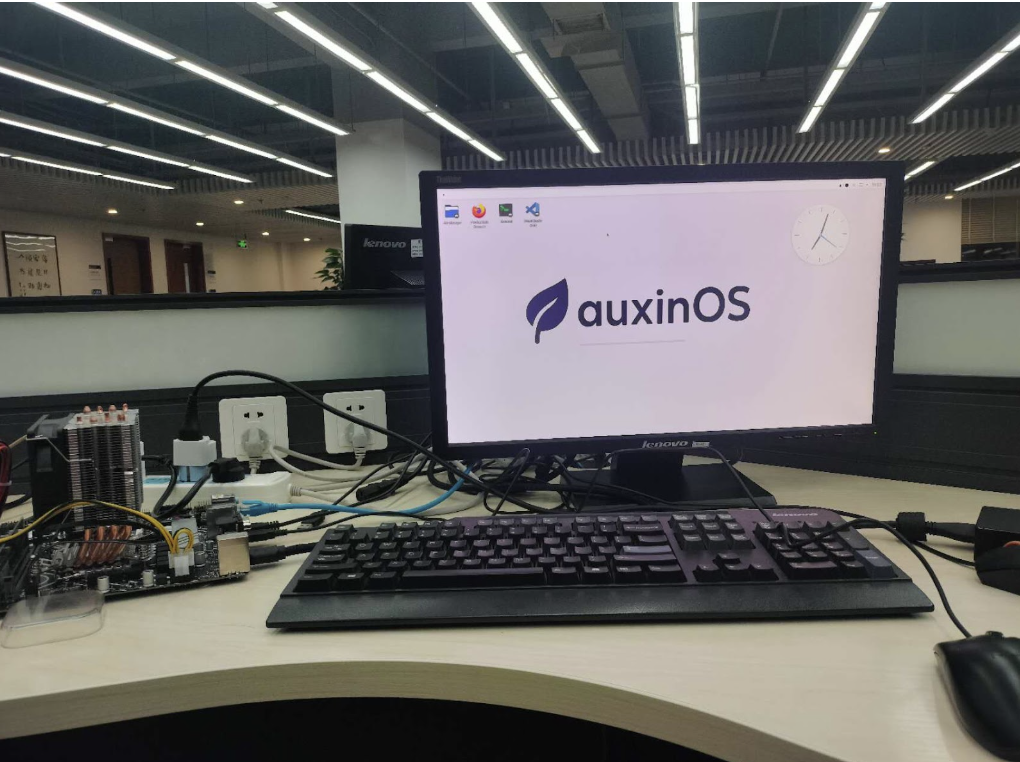
And with that, we’re done! Here’s a photo of the final system again:
Conclusion & next steps
This project has been a very great learning experience for me, and it makes me appreciate the complexity of modern systems that we take for granted. As of now, I plan to develop Auxin a little further by developing an SDK for it, namely a programming language, compiler (LLVM-based), and an IDE.
Once I’m done with that, I will move on to hardware: I want to make my own ARM-based motherboard, and port Auxin to it.
In the far future, I believe that robotics will be the next big thing. While I missed the AI boom (yes the AI boom is still ongoing, but what I want is to be one of the pioneers, not one of those crappy CS students from who-knows-where-they-come-from making RAG applications), I hope that with what I’ve learned and will learn, I can finally participate in the coming tech revolution!